Building cheaper version of rubber ducky using Digispark-ATTiny85 | 20 December 2017
Originally posted in https://abhijith.live/build-cheaper-version-of-rubber-ducky-using-digispark-attiny85/ on 20/Dec/2017.
Let's start with the term BadUSB first! BadUSB is a very dangerous vulnerability in USB devices, it allows the attackers to program the microcontrollers in these devices to make it behave like HID (Human interface devices) instead of simple storage drives. For example: Keyboards! Computers recognize these USB devices as a regular HID keyboard and allows to execute pre-programmed keystroke payloads. This can be also called as HID payload attacks.
Moving on to Rubber ducky! Just for the people who doesn't know what exactly is USB Rubber ducky, it is a keystroke payload injection tool disguised as a USB flash drive. It works based on the HID (Human interface device) functionality.
Payloads are created using a simple Rubber ducky scripting language and can be used to drop reverse shells, inject binaries, fetch cached passwords and many other automated functions for the penetration testers.
An attacker could go somewhere, plugin the USB device, boom! He gets the shell on his machine! Its that simple!
It was also featured in the well known hacking television series, Mr. Robot!
Who doesn't want to hack like Mr. Robot? eh?

Image rights belongs to Hak5 and Mr. Robot
Find more information about Rubber ducky from this URL: https://hakshop.com/products/usb-rubber-ducky-deluxe It can be bought from here. The price would be around 45 USD; converted to Indian Rupee as per today's dollar rate that would be nearly 2900 INR.
But, its a little bit expensive; right? So what are our other options?
We could also use Arduino boards to make our own Rubber ducky like BadUSB devices. Arduino boards are cheap compared to Rubber ducky. An entry level board will cost around 22 USD. That's like half the price of Rubber ducky. and Arduino boards are a little bit big in size. Arduino boards are listed in this URL: https://www.arduino.cc/en/Main/Products
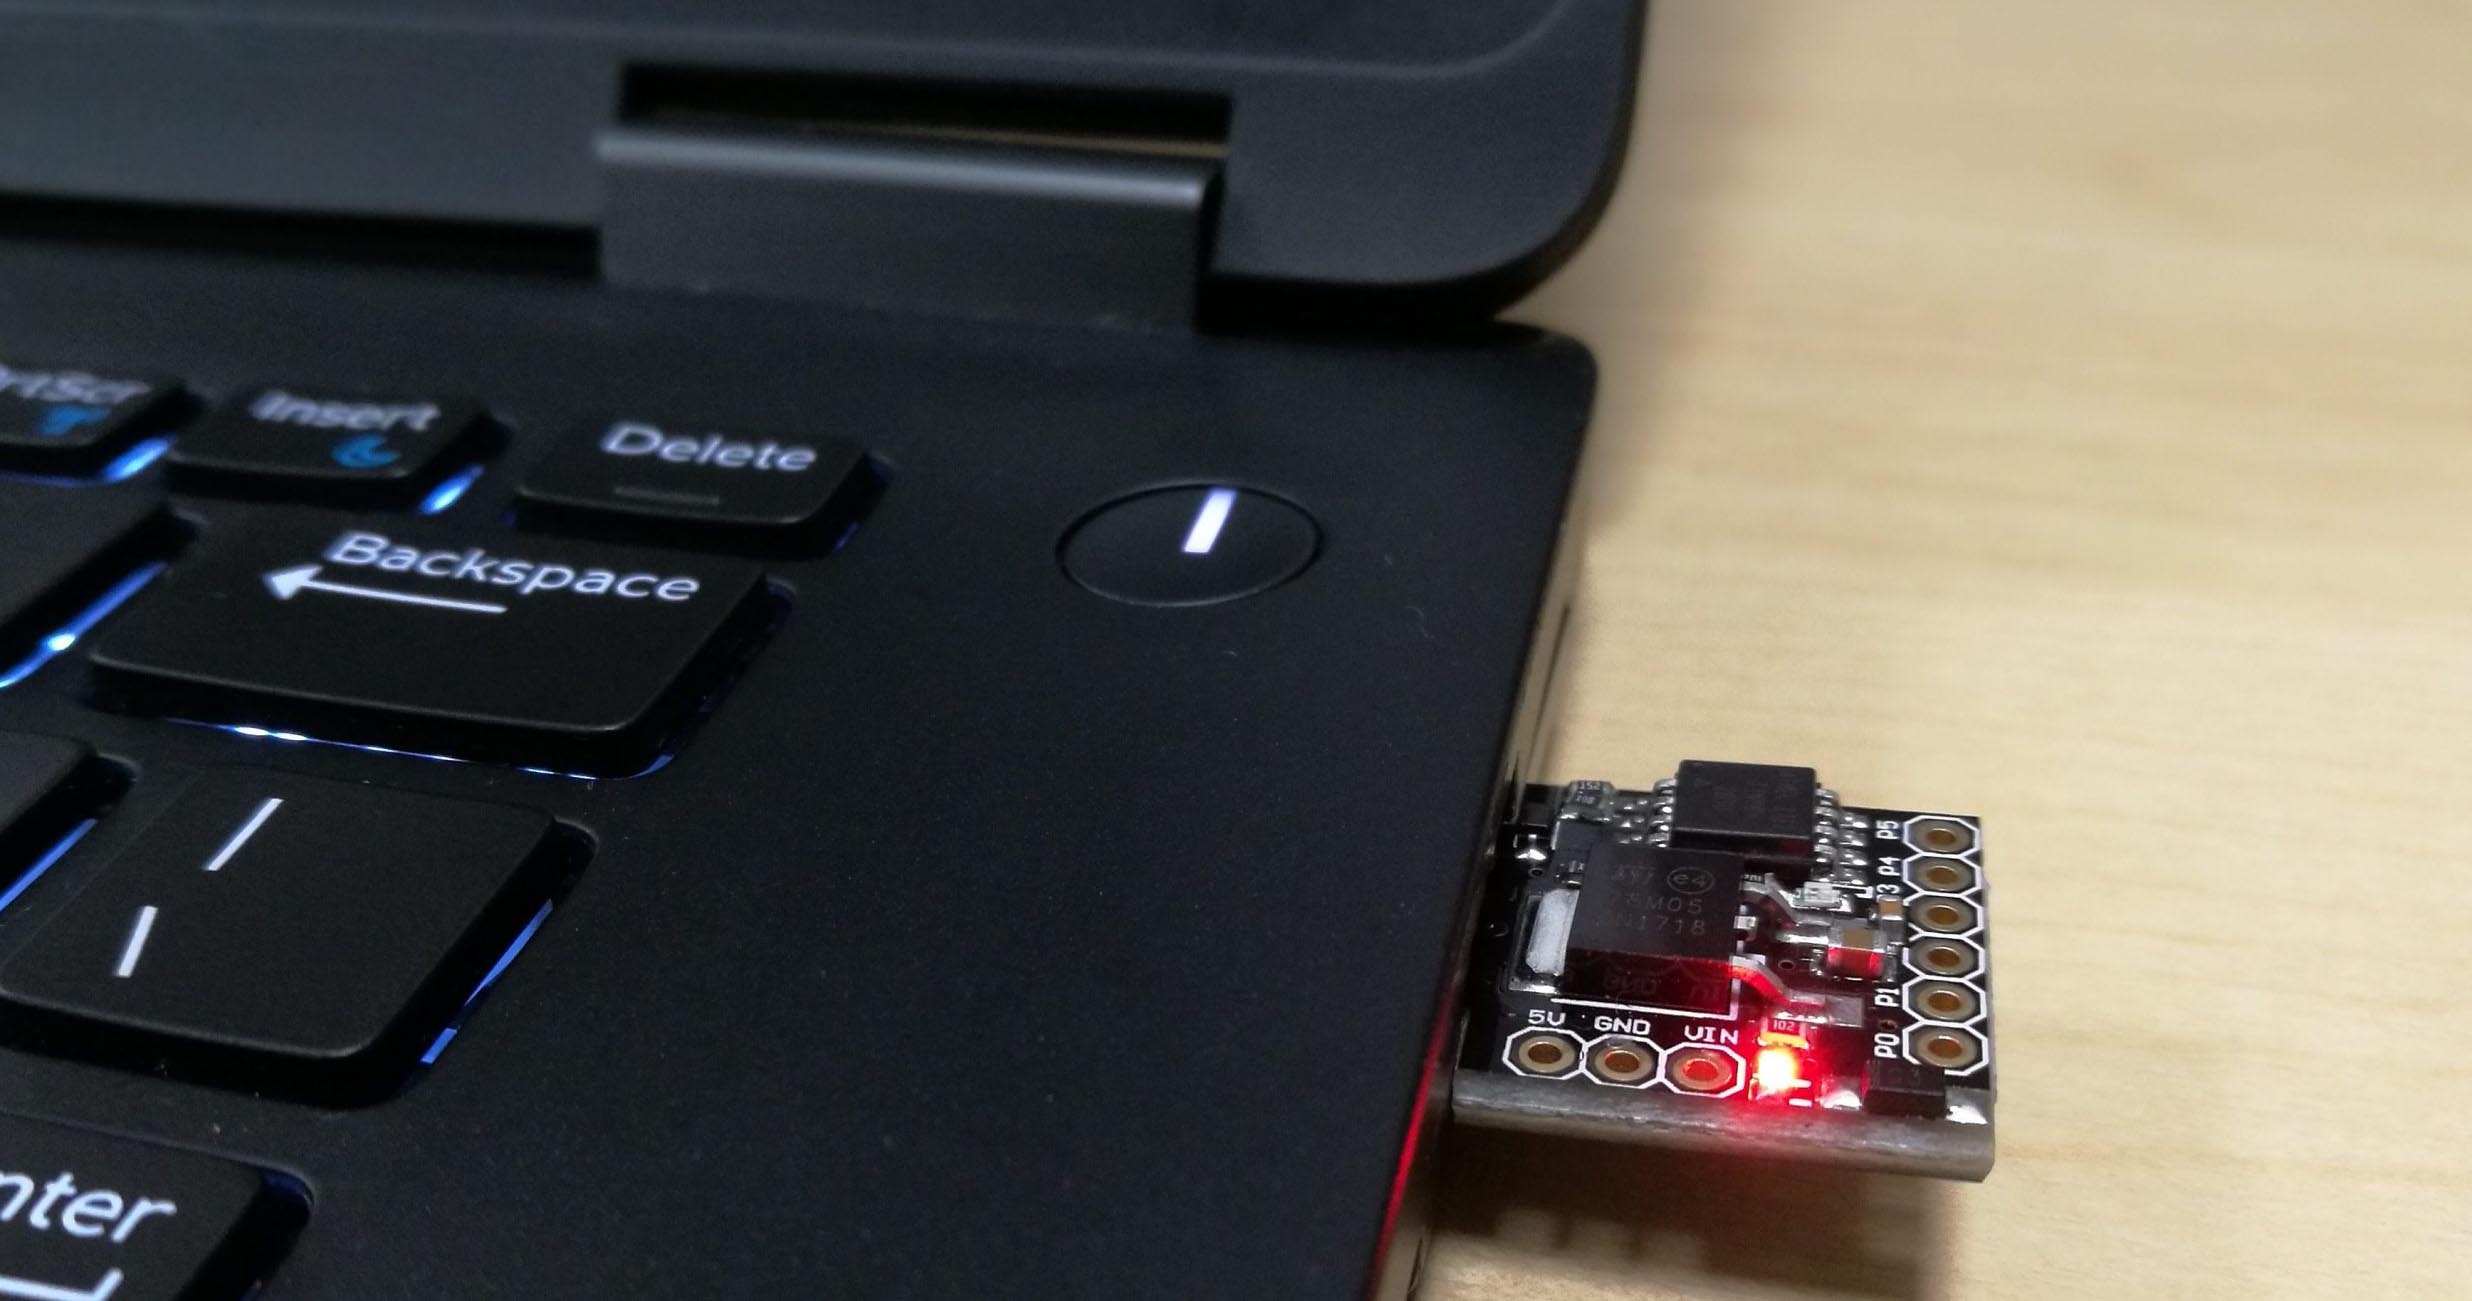
If we are looking for much cheaper/smaller alternatives, Then there is Digispark USB development board. The Digispark is an Attiny85 based microcontroller development board similar to Arduino. (ATtiny85 is the smallest microcontroller in ATMEL’s AVR family having less number of pins.)
Compared to Arduino, Digispark is cheaper, smaller, and a little bit less powerful. This is simply an entry level board which costs less than 5 USD. You can buy it from Amazon for less than 250 INR.
Search Amazon.in for Digispark ATTiny85 boards
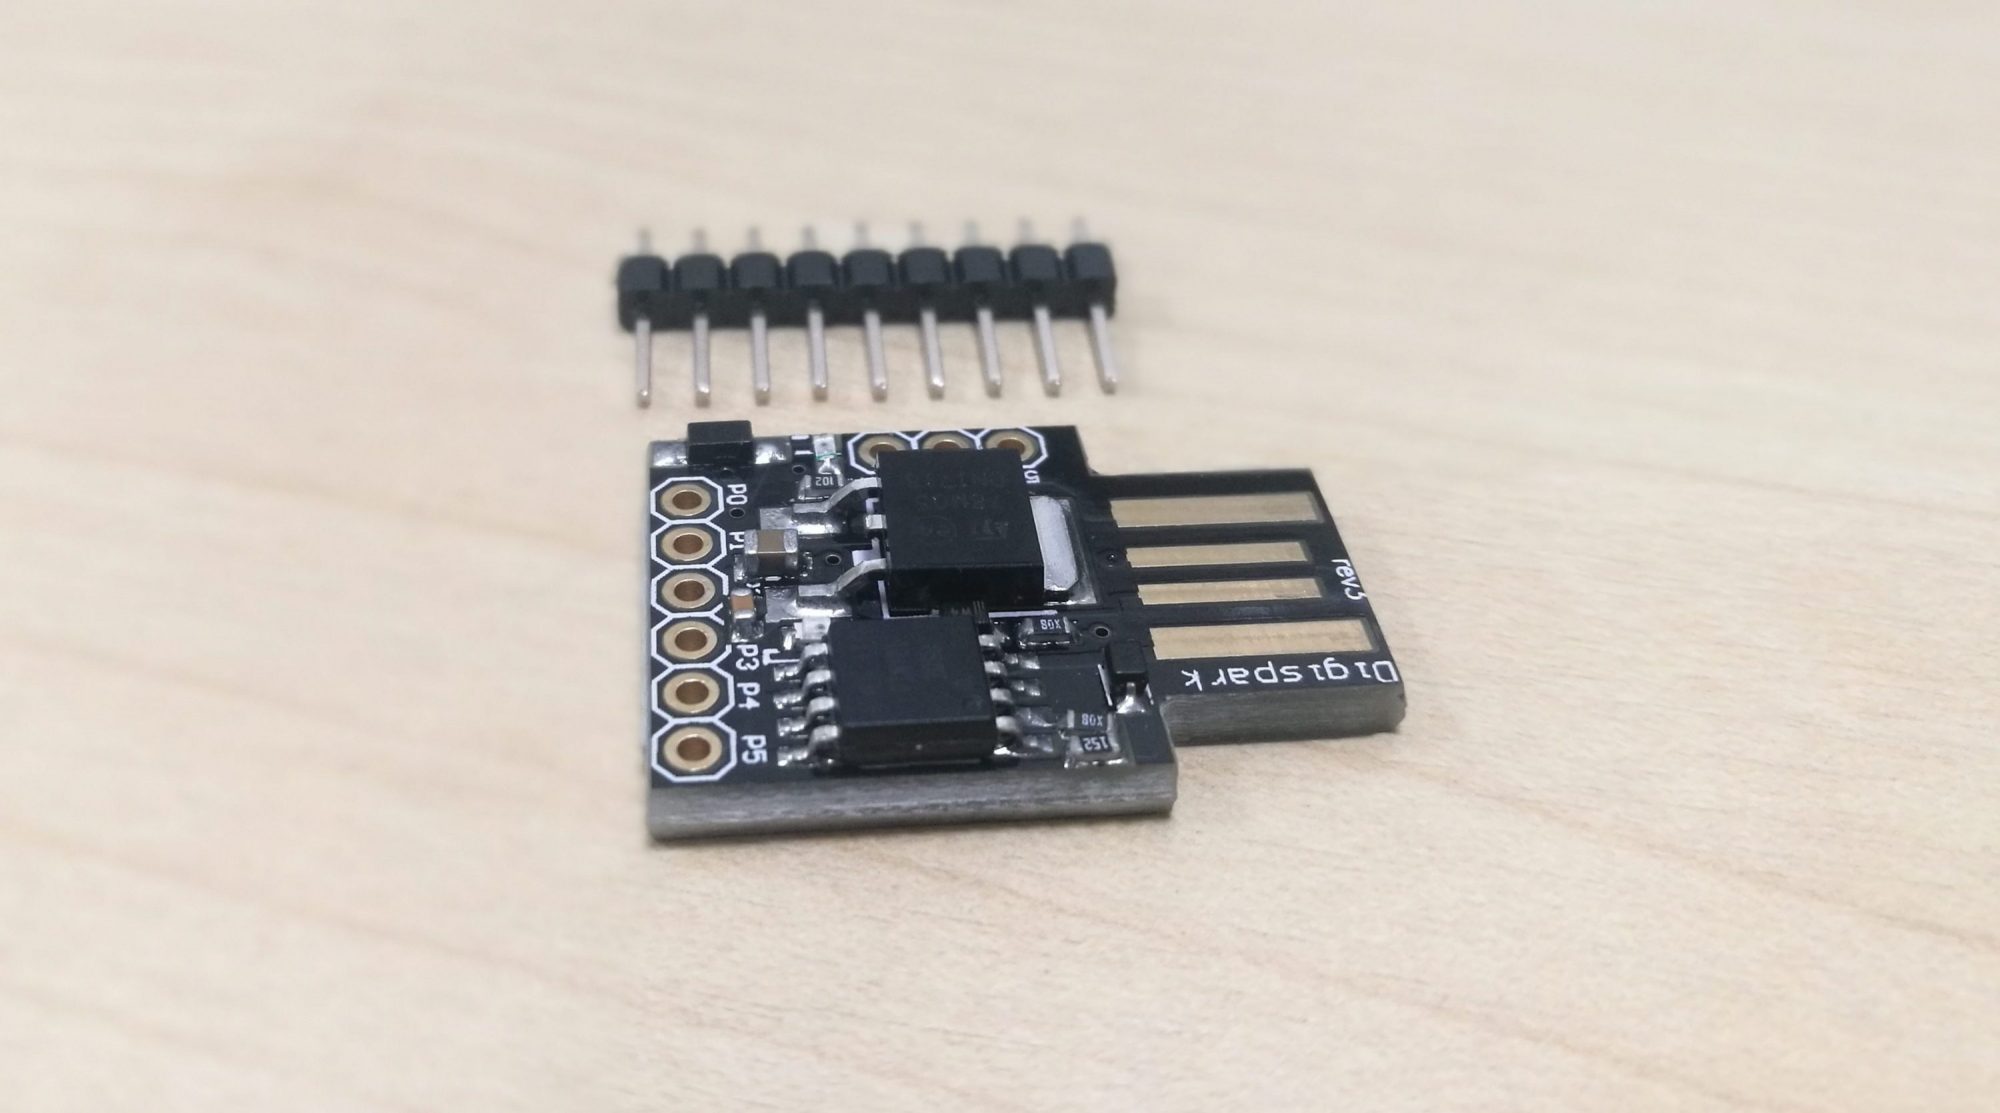
Also Digispark boards can be programmed using Arduino IDE. Attiny85 has about 8k bytes of programmable flash memory. The boot loader utilizes about 2k, the available memory would be 6k. It is very less compared to Arduino boards or Rubber ducky device. Anyway is is sufficient and all we have to do is limit the size of our payloads within 6k.
Enough boring stuff! Let's move to the interesting part!!
Step 1: We need to download and install drivers for Digispark from the following link. Make sure to install the correct version based on your machine architecture. (32 bit or 64 bit)
https://github.com/digistump/DigistumpArduino/releases/download/1.6.7/Digistump.Drivers.zip
Usually there will be some issues with the driver installation process. So please make sure to install the drivers properly. Refer the below screenshot from Windows device manager console. It should be like this.
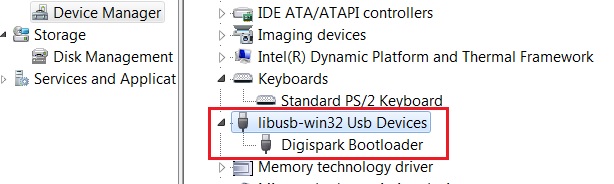
NOTE: If you are connecting the Digispark Attiny85 for the first time, the computer will detect the device, waits for 5 seconds and disconnects. You could hear the connect/disconnect notification tones from your computer continuously.
This is normal behavior; It happens only with un-programmed Digispark Attiny85 devices.
Step 2: Now, download the latest version of Arduino IDE from https://www.arduino.cc/en/main/software
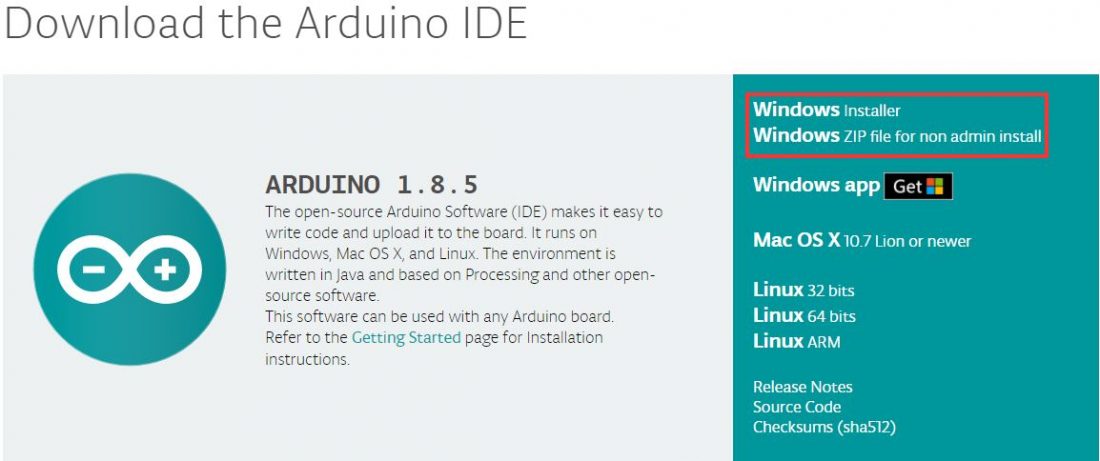
I was using Windows 7 operating system for the testing purposes, so i've used Windows installer for Arduino IDE in my laptop.
Step 3: Open Arduino IDE application, go to File -> Preferences
In the input field named "Additional Boards Manager URLs" enter the following URL.
http://digistump.com/package_digistump_index.json
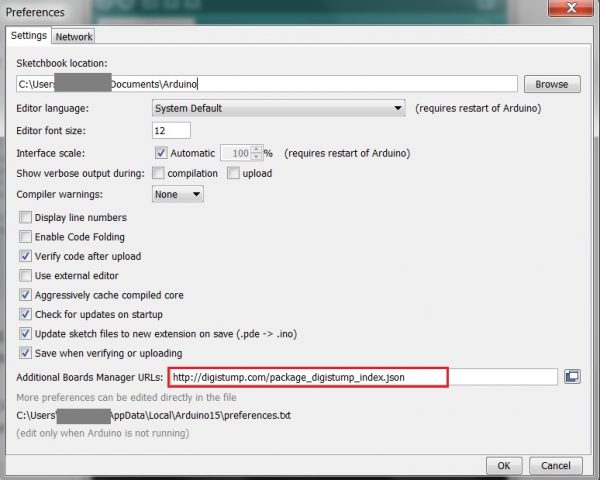
Arduino IDE - Preferences
Step 4: Go to Tools -> Board -> Boards Manager
From the drop down menu select "Contributed", Select the Digistump AVR Boards package and install it.
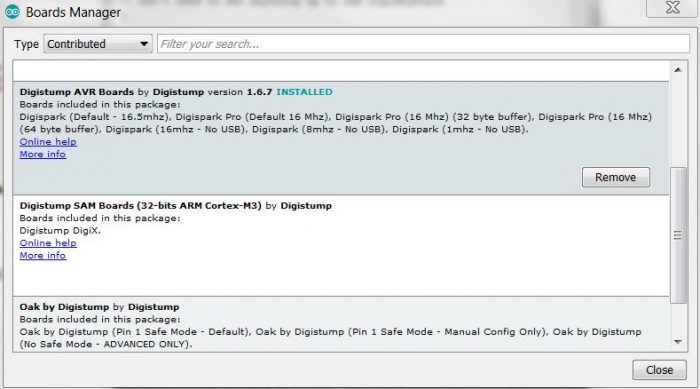
Digistump AVR boards package is pre-installed in here
Step 4: Finally, go to Tools -> Board, and select Digispark (Default - 16.5mhz) and set it as default.
Programming payloads to the Digispark ATTiny85 flash memory:
Rubber Ducky uses a simple programming language to create payloads. For Digispark, things are not that simple. We need to program our own payloads using Digikeyboard.h and Arduino IDE. There are some scripts available for Digispark ATTiny85 in the internet.
Payloads can be anything; It changes as per our goals and intentions! We can use meterpreter payloads, Download and execute payloads, reverse shells, powershell scripts etc. For red team engagements we can even use Empire, Unicorn, other powershell payloads, or even Macro based office payloads.
Keep in mind that we have only 8k of flash memory available here. We need to limit the size of our payloads according to that.
But i like to write scripts myself instead of being a copycat. Let's see, how to write a script to open Command prompt, Navigate to desktop directory and create a text file with "You have been pwned" statement. This is just an example to understand Bad USB / HID payload attacks.
Do not connect Digispark while programming the sketches. It will prompt to plug in the USB device later.
Open Arduino IDE, Create a new sketch and copy the below script in the IDE and save it.
//This DigiSpark script creates a text file on desktop with pwned message
#include "DigiKeyboard.h"
void setup() {
}
void loop() {
 DigiKeyboard.sendKeyStroke(0);
 DigiKeyboard.delay(500);
 DigiKeyboard.sendKeyStroke(KEY_R, MOD_GUI_LEFT);
 DigiKeyboard.delay(500);
 DigiKeyboard.print("cmd /k cd %UserProfile%/Desktop");
 DigiKeyboard.sendKeyStroke(KEY_ENTER);
 DigiKeyboard.delay(500);
 DigiKeyboard.print("echo YOU HAVE BEEN PWNED > YOU_HAVE_BEEN_PWNED.TXT");
 DigiKeyboard.sendKeyStroke(KEY_ENTER);
 DigiKeyboard.delay(500);
 DigiKeyboard.print("exit");
 DigiKeyboard.sendKeyStroke(KEY_ENTER);
 DigiKeyboard.delay(500);
 for (;;) {
 /*empty*/
}
}
The blank for loop at the end of the sketch is to avoid unconditional execution of our payload. Otherwise it would run in a continuous loop trying to create You_have_been_pwned.txt files.
Click Sketch -> Upload or click Upload button on the top left
The sketch will be verified/compiled then the Arduino IDE will prompt to plug in the Digispark USB within 60 seconds.
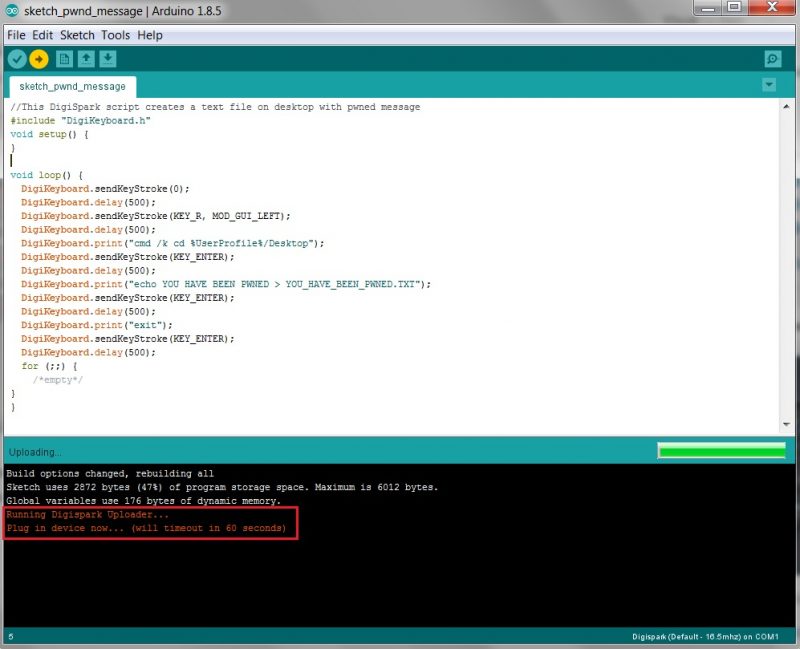
Arduino IDE prompts to plug in Digispark usb
Once you connect the DIgispark, the Arduino IDE writes the code to the microcontoller then displays the below message.
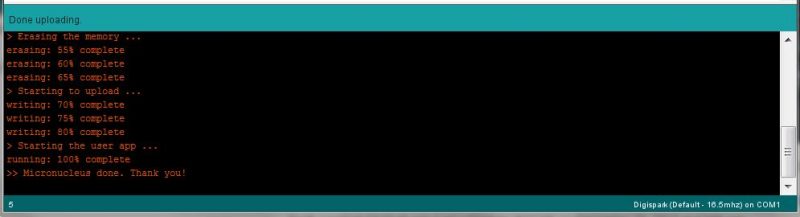
Uploaded the script successfully
Now just plug it into your windows computer. It will automate a few keystrokes, then creates a *.txt file in the Desktop directory. This is just an example to demonstrate how Digispark Bad USB works. If we are programming Digispark for launching a shell, it will do the same.
Update: I've uploaded a short video of this example in the old blog post and could not find it anywhere to attach here..
This post has became pretty long, Let's stop here for now. If time permits I'll come back with another write-up about real life exploitation using Digispark ATTiny85 - Bad USB and more powerful payloads.
Please feel free to let me know, if you find this article useful! :)
Go back to Blog and Random Thoughts